My Libreboot T480
Notice
This guide is unofficial, it was created to facilitate installation and help. I am human and prone to errors, if you notice any mistakes, please let me know. The most reliable source is the official page:
Good luck with the installation. Welcome to the community.
Index
Resources
- Unofficial Guide by Mission_Catanloupe23 was one of the guides I based on.
- Official T480 Guide
- Official Programmer Guide
- Build Guide
- Vendor Guide
- Devmem Guide
- Grub Hardening Guide
- Download Link
- Libreboot 26.01 Release Notes
- Flashprog Download
- BIOS Download
- Unofficial Ezntek Guide
- Flash BIOS
- Geteltorito
Required Materials
- External computer or something that can run a Linux/BSD/Mac terminal
- USB drive
- Programmer, in my case, Raspberry Pi Pico
- SOIC-8 clip
- Jumper wires
- Internet
- Screwdriver
- Luck and patience
Downgrade/Upgrade Factory BIOS
wget https://download.lenovo.com/pccbbs/mobiles/n24ur39w.iso
git clone https://github.com/rainer042/geteltorito
chmod +x geteltorito/geteltorito.pl
geteltorito/geteltorito.pl -o t480_bios_update.img /path/to/your/downloaded.iso
sudo dd if=t480_bios_update.img of=/dev/sdX bs=4M conv=fsync status=progress
In BIOS:
- Disable Secure Rollback Prevention under UEFI BIOS Update Option.
- Enable Flash BIOS Updating by End Users.
- Disable SecureBoot.
Make sure the PC is well-charged or connected to power.
Then connect the USB drive and select it from the Boot menu (F12 before or during the LENOVO logo). Follow the instructions.
Before Flashing LIBREBOOT
In addition to the options above, add this and be careful with the following points on the T480:
- Enable Legacy BIOS.
- Remove the external battery.
- Disconnect the internal battery.
- Disconnect the CMOS battery.
Prepare Firmware/Flash Vendor Blobs
Next, on another PC:
Download the Libreboot image for the T480/T480s. Download from this page, select any link under HTTPS Mirror or other options, but those are recommended.
You should download the following file depending on your model, T480/T480s. In this case, T480:
stable/ -> 26.01/ -> roms/ -> libreboot-26.01_t480_vfsp_16mb.tar.xz
Also, download the sha512 (OPTIONAL):
stable/ -> 26.01/ -> roms/ -> libreboot-26.01_t480_vfsp_16mb.tar.xz.sha512
If you see this in the future, just replace 26.01 with the newest release number.
sha512sum -c libreboot-26.01_t480_vfsp_16mb.tar.xz.sha512
If they match, everything is fine.
Set up the git user:
sudo dnf install git
git config --global user.name "John Doe"
git config --global user.email "johnDoe123@email.com"
To flash the vendor blobs, we need lbmk:
git clone https://codeberg.org/libreboot/lbmk.git
Then:
cd lbmk
sudo ./mk dependencies fedora41
Or whichever distribution you are using (Check: config/dependencies/ for list of supported distros.):
sudo ./mk dependencies arch
sudo ./mk dependencies ubuntu
sudo ./mk dependencies debian
#...
Prepare Roms
Usually, you move the libreboot-26.01_t480_vfsp_16mb.tar.xz into lbmk. However, it can be anywhere, you just need to put the correct path.
Now, from rev8, the MAC address is automatically set with the following command:
cd lbmk
./mk inject libreboot-26.01_t480_vfsp_16mb.tar.xz
Raspberry Pi Pico
Download here as before.
stable -> 26.01 -> roms -> libreboot-26.01_serprog_pico.tar.xz
tar -xf libreboot-26.01_serprog_pico.tar.xz
cd bin/serprog_pico/
- Connect the Raspberry Pi Pico by pressing BOOTSEL, then mount it on /mnt.
- Now copy serprog_pico.uf2 to the Raspberry Pi Pico, i.e., to /mnt.
- That should be it. umount /mnt and sync, and you’re done.
To check, remount it, and the .uf2 should disappear. Then:
sudo dmesg | grep -i "tty"
You should see something like:
[ 1196.211884] cdc_acm 1-2:1.0: ttyACM0: USB ACM device
Remember ttyACM0 or the number that appears.
Flash
Install Flashprog
This should work, but it didn’t for me, so I had to do it manually in Method 2.
METHOD 1:
cd lbmk
./mk -b flashprog
METHOD 2:
Clone the repository:
git clone https://review.sourcearcade.org/flashprog.git
Then, install the corresponding dependencies. For Fedora:
sudo dnf install -y gcc meson ninja pkg-config pciutils libusb libftdi libgpiod libjaylink
To know which packages to install on other distributions, you can:
Go to flashprog/Documentation and check the building_meson.md file; it lists the dependencies for some distributions.
If not, search your distribution for the names of the dependencies listed on the Official Page. Then, to install flashprog:
cd flashprog
make
sudo make install
Connect SOIC-8
Connect the Raspberry Pi Pico to the SOIC-8 as shown in this image.
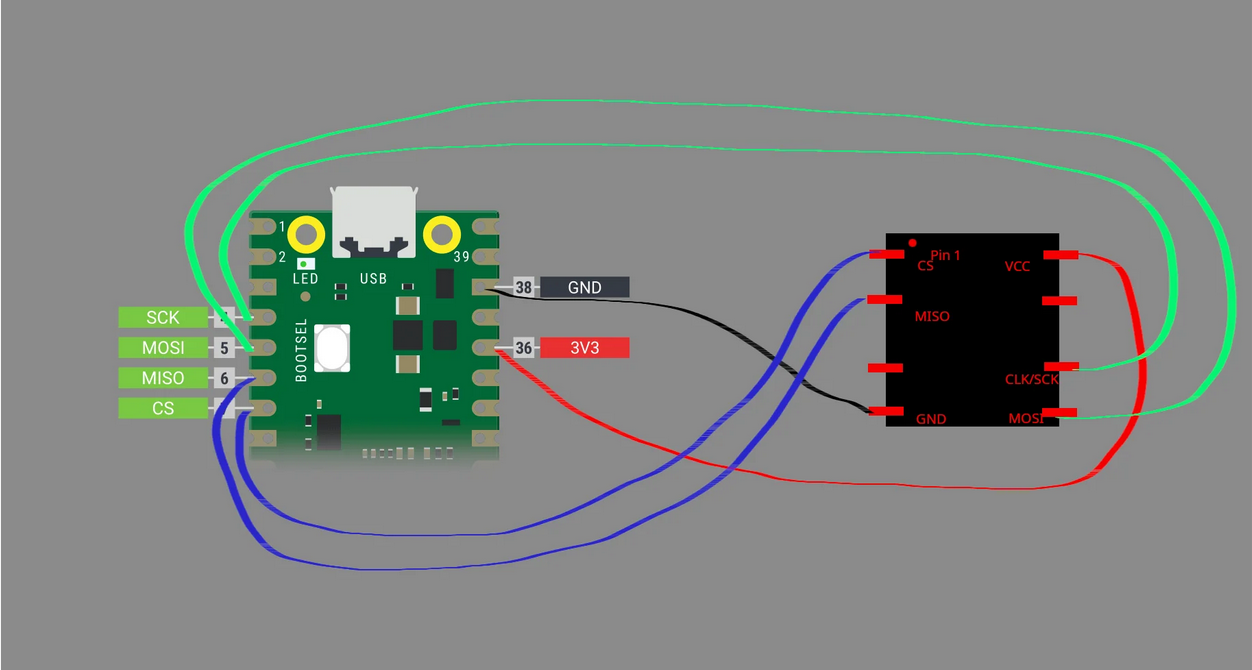 Image from Mission_Catanloupe23
The order of the jumpers is important, make sure to align them physically with the one in the image above.
Here are some of my images:
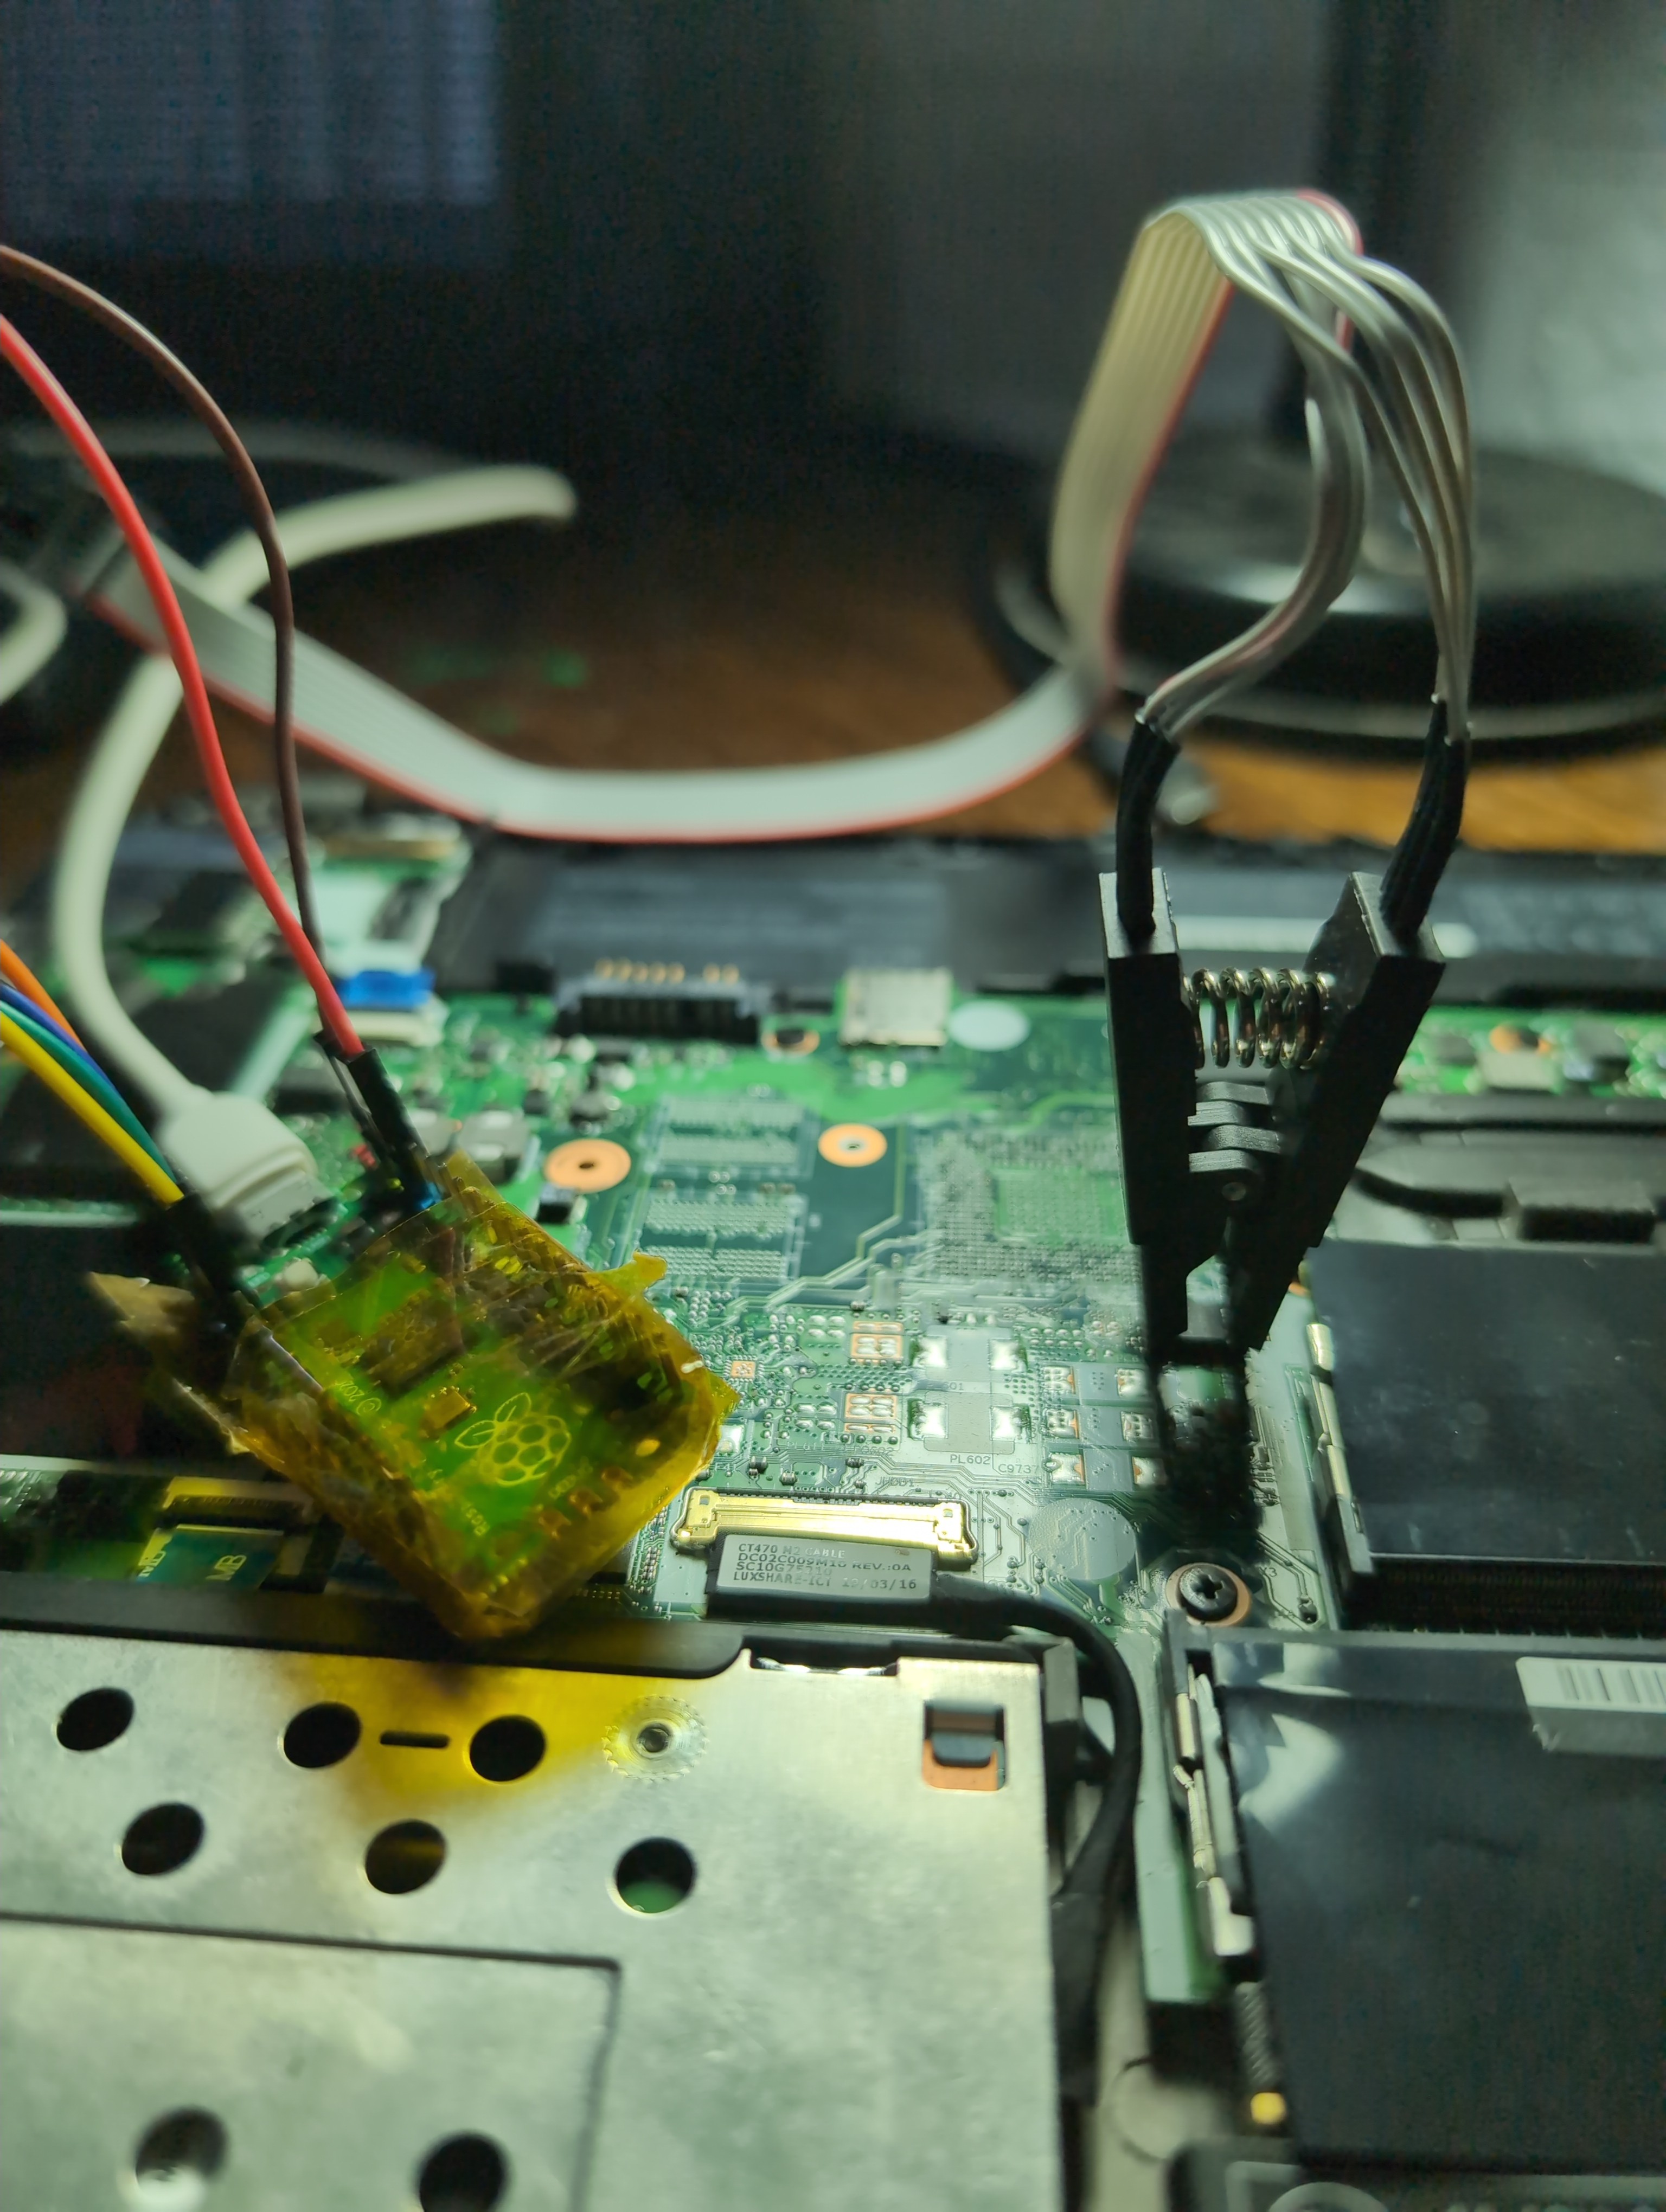
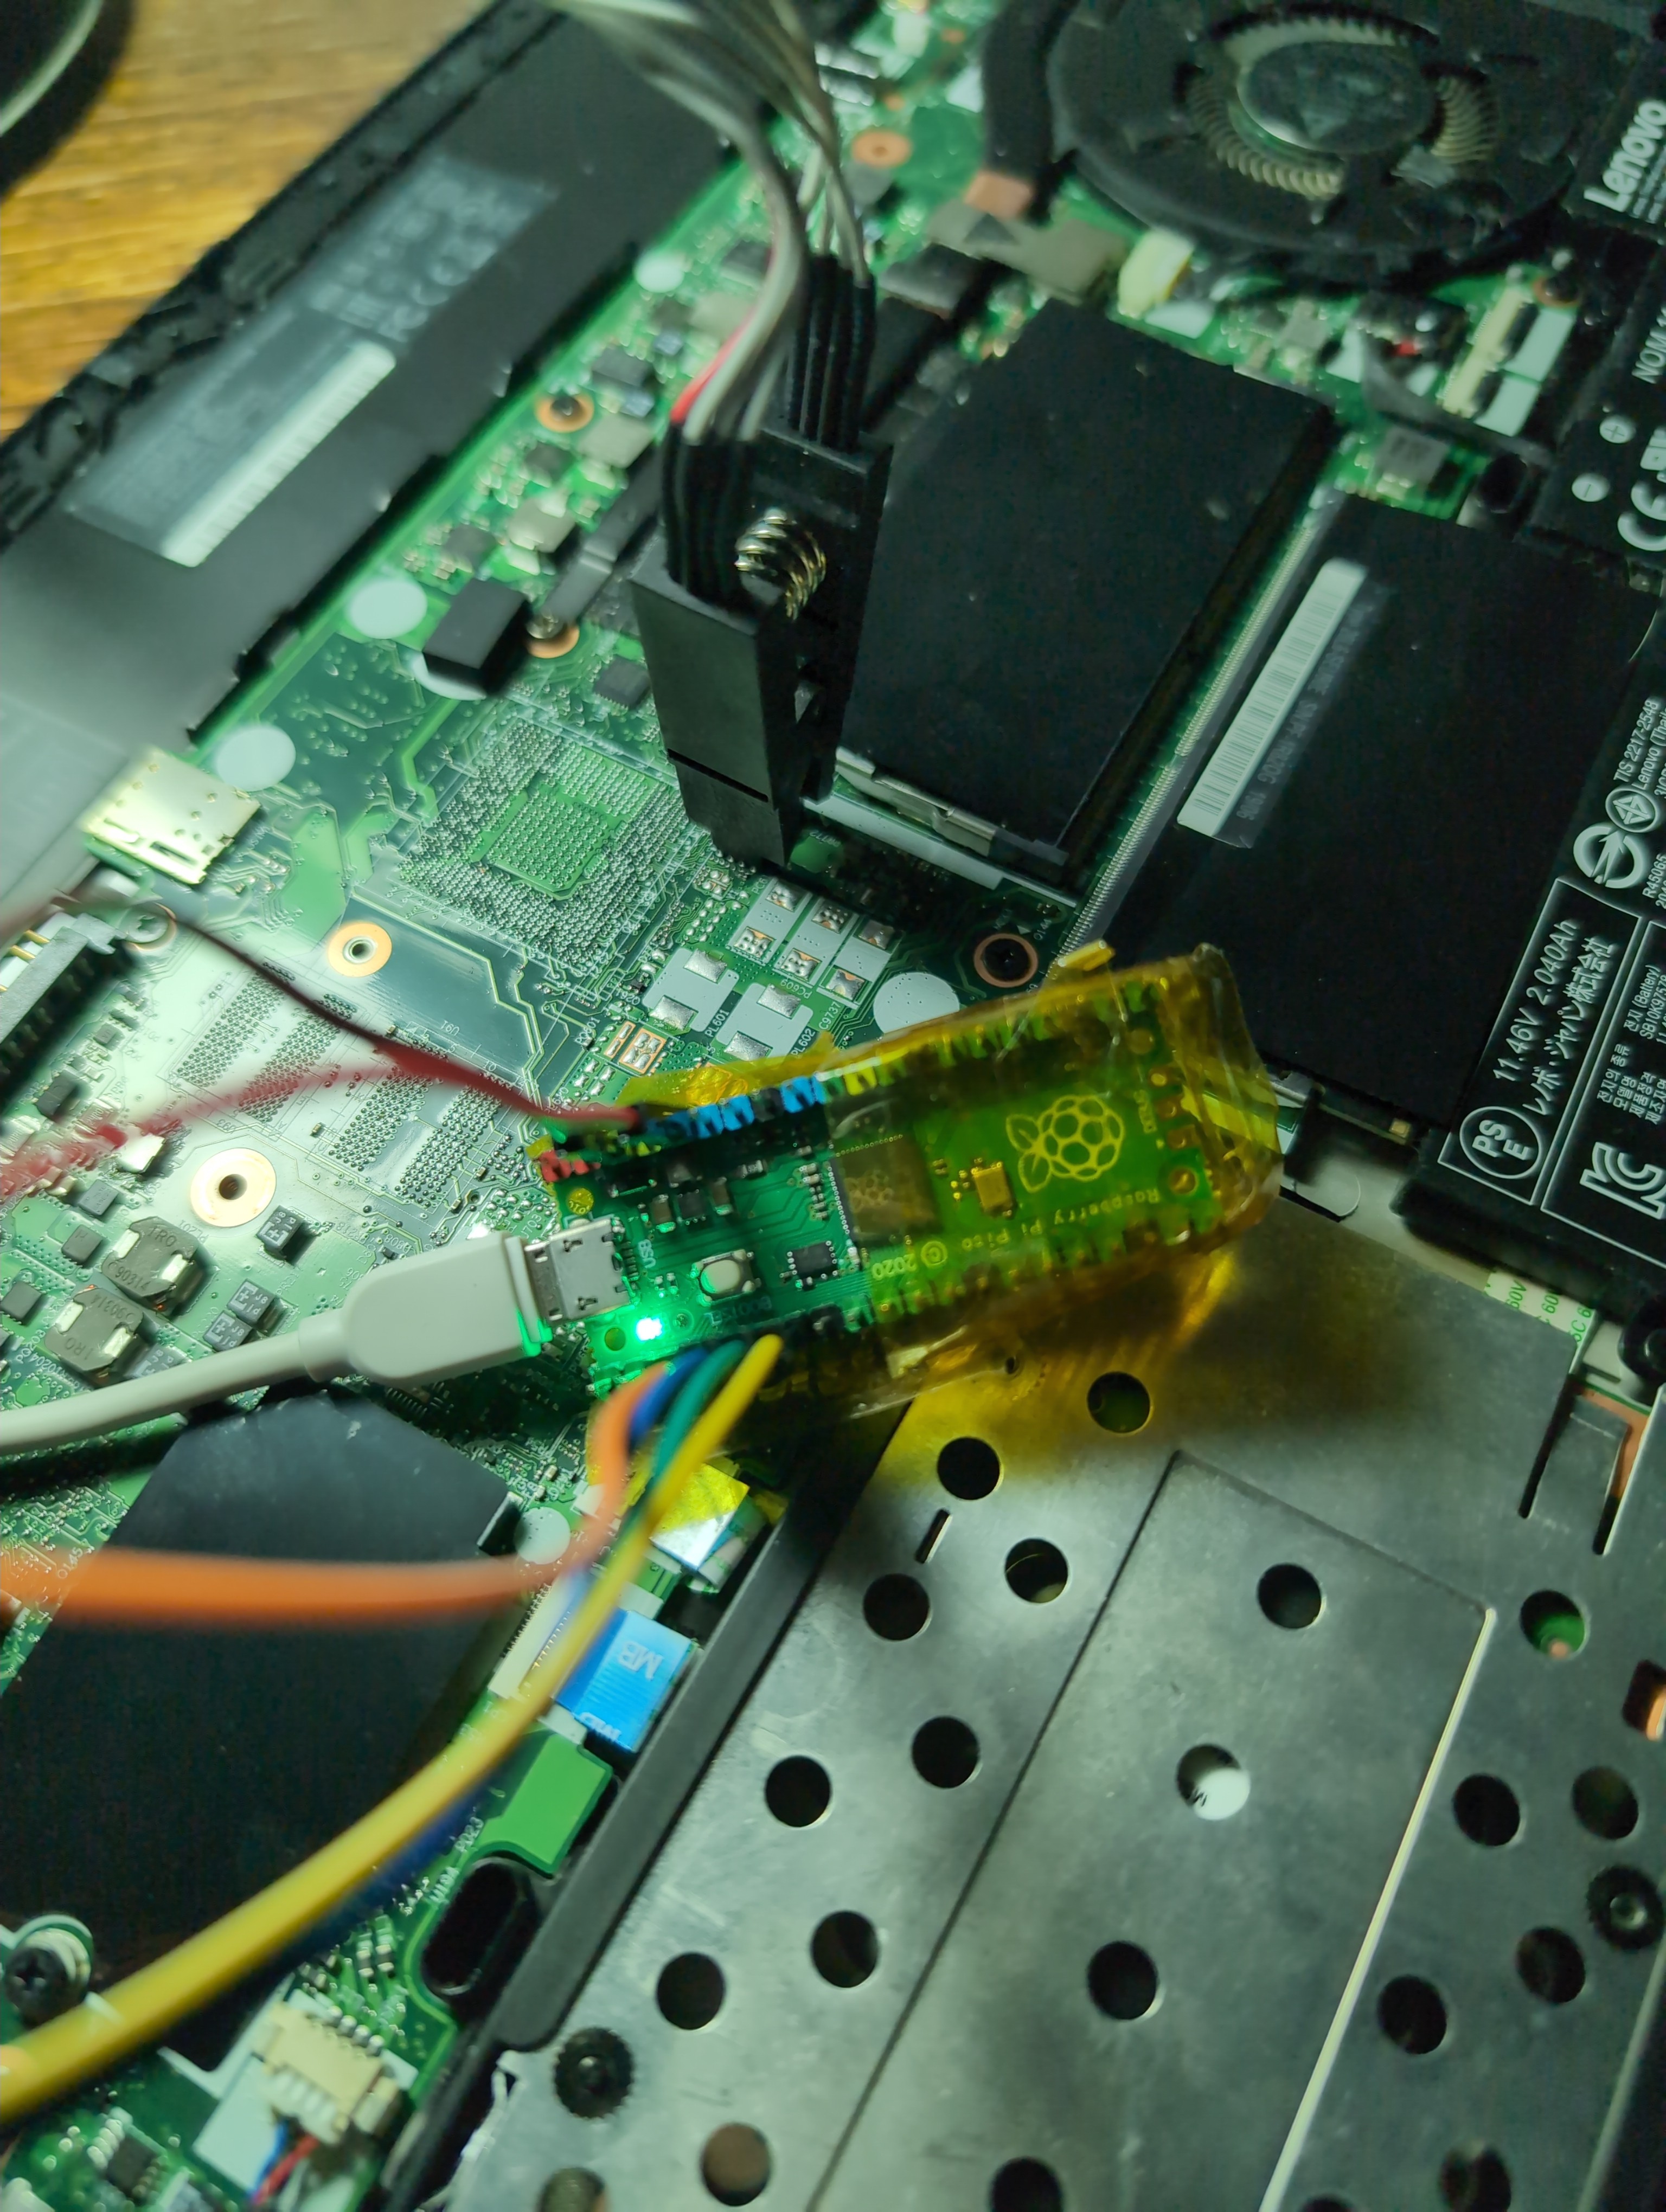
In the last one, it appears green because the flashprog command is being used.
BIOS Backup
We will need ttyACM0 (use the one you noted before) and the chip’s name (appears physically).
In my case, they are as follows, and we will perform some backups of BIOS and verify the connection of the clip:
sudo flashprog -p serprog:dev=/dev/ttyACM0 -c "W25Q128.V" -r t480_stockbios_1.bin
sudo flashprog -p serprog:dev=/dev/ttyACM0 -c "W25Q128.V" -r t480_stockbios_2.bin
sudo flashprog -p serprog:dev=/dev/ttyACM0 -c "W25Q128.V" -r t480_stockbios_3.bin
sha256sum t480_stockbios*.bin
If they don’t match, disconnect FIRST FROM THE PC, then disconnect the clip and reconnect it. When all the sha256 values match, you can proceed.
Select Rom and Flash
Extract libreboot-26.01_t480_vfsp_16mb.tar.xz:
tar -xf libreboot-26.01_t480_vfsp_16mb.tar.xz
cd /bin/t480_vfsp_16mb
Select the one you want and run:
sudo flashprog -p serprog:dev=/dev/ttyACM0 -c "W25Q128.V" -w seagrub_t480_vfsp_16mb_libgfxinit_corebootfb_usqwerty.rom
Congratulations!! Enjoy your new Libreboot.
Internal Flashing
This works for updates. If you already installed Libreboot using the above method, you can now do it internally without problems.
sudo vim /etc/default/grub
Search for GRUB_CMDLINE_LINUX and add iomem, if it has another parameter, place it next to it:
GRUB_CMDLINE_LINUX="iomem=relaxed other parameters"
In Fedora:
sudo grub2-mkconfig -o /boot/grub2/grub.cfg
In Debian:
sudo update-grub
In other distros, look it up.
Then, reboot.
These steps are necessary:
- Prepare Firmware/Flash Vendor Blobs
- Prepare Roms
- Install Flashprog
- Select Rom and Flash (Skip the last flashprog command)
Quick review
stable/ -> 26.01/ -> roms/ -> libreboot-26.01_t480_vfsp_16mb.tar.xz
Direct Link REMEMBER: This could be outdated
git clone https://codeberg.org/libreboot/lbmk.git
cd lbmk
# If is already setup don't override it
git config --global user.name "John Doe" # Can be any name and any email
git config --global user.email "johnDoe123@email.com"
sudo ./mk dependencies fedora41 # Your distro here if its accepted
./mk inject libreboot-26.01_t480_vfsp_16mb.tar.xz
./mk -b flashprog # Or check method 2 in "Install Flashprog"
tar -xf libreboot-26.01_t480_vfsp_16mb.tar.xz
cd /bin/t480_vfsp_16mb
Optional:
sudo flashprog -p internal -r bios-backup.bin
Internal Flashing:
sudo flashprog -p internal -w XXXX.rom # Select any .rom you like
# For example
sudo flashprog -p internal -w seagrub_t480_vfsp_16mb_libgfxinit_corebootfb_usqwerty.rom
Problems
Fedora Won’t Boot
It’s an easy problem to fix. It’s explained Here. Basically, for modern versions, it’s fixed by modifying the following line in /etc/default/grub:
GRUB_ENABLE_BLSCFG=false
Then:
sudo grub2-mkconfig -o /boot/grub2/grub.cfg
Time Synchronization Problem
If you have time issues due to removing the CMOS battery.
sudo timedatectl set-ntp false
sudo date -s -u "HH:MM:SS" # Check UTC time on any reliable website
sudo timedatectl set-timezone UTC # You can set your timezone here
sudo hwclock --systohc
sudo timedatectl set-ntp true
If it doesn’t work, it should be something similar. Use timedatectl to check times.
Sound Problem
This issue was mentioned by Mission_Catanloupe23, but in Libreboot 26.01 the jack detection issue is fixed. If you are on an older release and still see it, you can switch outputs manually in Pulseaudio Volume Control or pavucontrol.
Thunderbolt Flash
Thunderbolt support was added in 26.01 RC1, but it was removed before the final 26.01 release due to S3 resume issues. It is still in development/testing.
Doesn’t Turn On
An issue that happened to me was the following: the PC suddenly turned off and wouldn’t turn back on. The only thing it did was blink the power button light when plugged into a charger, but it wouldn’t power on or do anything else.
The solution is to open it up, disconnect the CMOS battery (and the internal battery too, if it has one), and to be sure, press and hold the power button for 30 seconds (with everything disconnected) to fully discharge the computer. Then reconnect everything and it should work.
My theory is that it might be an error related to the Thunderbolt port, but I have no idea why. Still, this is a simple and quick fix, so don’t panic if it ever happens to you.
Others
For more doubts or issues, check these official resources: